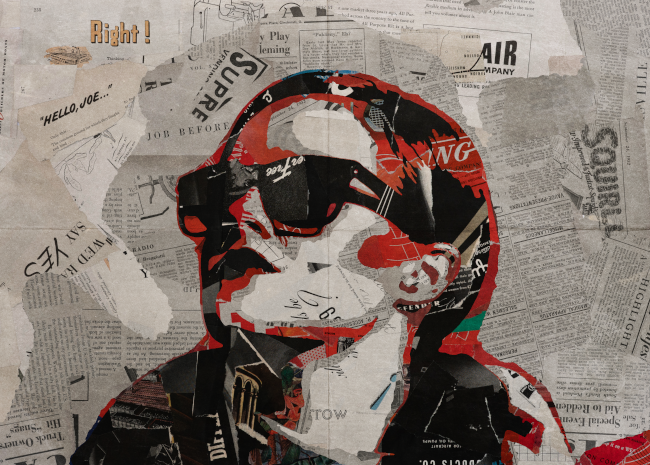
Create A Collage Effect With Gimp Part Two
By
09:19:00

In Part One of this tutorial we covered some introductory background, as well as creating a gradient to be used later. Now we can get down to creating the collage effect with Gimp. Before we start however, if you haven't already done so grab the texture downloads linked to in Part One, as well as the photo used here.
One of the steps below involves using the G'MIC posterize filter. If you don't have G'MIC installed in Gimp I highly recommend grabbing it now. If you prefer, the standard Gimp posterize filter can be used instead (Colors > Posterize), although the G'MIC version has more adjustable settings.
There may seem a lot of steps to this tutorial, but don't let that put you off. I try to cover each small step to make the tutorial easier to follow. Click on each image to enlarge if you need to.

1/ Open the image in Gimp

2/ With the Rectangle Select Tool drag a rectangle around the part of the image you want to use.

3/ Hit Image > Crop to Selection. Keeping the image simple and uncluttered works well with this effect, rather than using a complex subject matter.

4/ The image is now cropped. Right click on the image's layer in the Layers panel, and from the drop down menu select Add Alpha Channel.

5/ Making a copy of the layer is useful in case you need to go back and start again.

6/ Select Colors > Desaturate > Desaturate.

7/ In the window that opens select a Mode from the drop down list and hit OK.

8/ The image is now monochrome.

9/ Select Colors > Levels.

10/ This window will open. The tonal range of the image can be adjusted here. We need something with deep tones going to light.
The triangular handles highlighted in red can be dragged to the left and right. The white triangle influences the lighter tones, and the black triangle influences the darker tones. The centre triangle can fine tune both.
When you're happy with the image hit OK.

11/ This is the image after the levels have been adjusted.
Using The G'MIC Posterize Filter

1/ Select Filter > G'MIC-Qt. We're going to use the G'MIC posterize filter because its has much finer controls than the standard Gimp posterize filter. If you don't have G'MIC installed on your version of Gimp the standard Colors > Posterize filter can be used instead.

2/ The G'MIC window will look something like this. Select Artistic, and from the drop down list select Posterize.

3/ There are a number of sliders for tweaking the image. Firstly set Colors to 5, and adjust Smoothness to something you're happy with. Tinker with Edges if you think it helps.
Hit OK when you're done. It may take G'MIC a while to render the image.

4/ This is the posterized image.

5/ As we've previously mentioned, the collage effect works best on simple, uncluttered images, so this one has been tidied up a little. Using the Eyedropper and Paintbrush tools, areas that wouldn't add to the collage effect have been painted over with neighbouring grey tones, so a cleaner looking image is left.
Noise Reduction

1/ Sometimes posterizing an image can leave jagged edges to image outlines. In this instance this can be fixed by selecting Filters > Enhance > Noise Reduction.

2/ Zooming in and using the Split view option shows the difference the Noise Reduction makes. The default setting of 4 works well here, but the settings go as high as 32.
When you're ready hit OK.
Gradient Map

1/ Before applying a gradient map a duplicate layer has been aded, just in case we need to go back a few stages.
Selet the Gradient tool, and make sure the gradient made in Part One is the active gradient.

2/ Select Colors >Map > Gradient Map.

3/ The active layer will now look like the above. Each colour from the gradient created in Part One has been applied to a shade of grey in the posterized image.

4/ Sometimes one of the colours from the gradient won't appear after applying the gradient map. To overcome this, undo applying the gradient map (Ctrl > Z), then select the Gradient Editor, highlighted in red, top right.
A panel showing the gradient colour bands will be visible, along with triangular handles below them (highlighted in purple). Drag these handles so the missing colour takes up more (or less) of the gradient, then apply the gradient map again. This may take a few attempts, but usually the gradient map will apply correctly first time.

5/ Another problem that may occur is that the first colour takes on the foreground colour. To fix this change the foreground colour to black. Now right click on the furthest left triangle handle under the gradient panel, then select Left Color Type > Fixed.
Color To Alpha

1/ In the original Photoshop version, the 'Blend if' feature was used for this step, but since Gimp doesn't have that function we have to work around it. Instead we're going to replace each colour of the gradient map with a transparency, and we'll use Alpha to Transparency to do this. The transparency will then be used to build up the collage image with the textures we downloaded.
Each colour can't be replaced with a transparency on just one layer, so a layer for each colour is needed. As can be seen in the layers panel above, there's five duplicates of the image (plus an extra one again, just in case we mess things up).

2/ After making duplicate layers hide all them except the fourth from bottom, and make sure this is the active layer. Select Colors > Color to Alpha.

3/ This window will appear. To select the colour to become transparent hit the white colour bar.

4/ This second window will appear. The first colour we want to change to alpha is black, so drag the three RGB sliders at the top of the window fully to the left.

5/ The active layer will now look like this. The black has been replaced by transparency.

6/ Hide the layer we were just working on and show the layer directly above it. This should now also be the active layer.
We're going to replace the red from this layer with transparency in exactly the same way we removed black from the other layer.
Select Colors > Color to Alpha. In the window that opens hit the Color bar to open the second window. Because we want red to be removed, drag the handle of the R slider fully to the right, and the G and B sliders fully to the left. Hit OK when you're ready.

7/ Following the previous steps, hide this layer then show the layer above and make it the active layer.
We're going to remove green from this layer so follow the steps above, but this time drag the G slider all the way to the right, and the R and B sliders fully to the left.

8/ In the final layer we're going to remove the blue. Follow all the steps above again, except this time move the B slider all the way to the right, and the R and G sliders all the way to the left.
Creating Texture Layers

1/ We're finally ready to use the Texturelab jpegs to construct the image. To begin with, hide all layers, except the layer with black removed. Make the layer below it the active layer. This is so when we drag in the first jpeg it will be placed just above the active layer, and hence just below the no black layer.
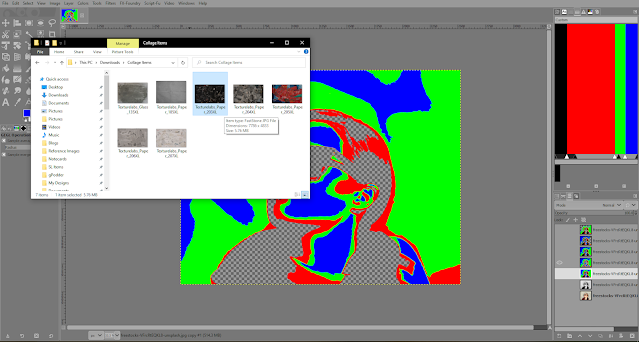
2/ Open the folder that the jpegs were downloaded to. Since black was the darkest colour of the image, we'll now use the darkest texture. Drag it from the folder onto the Gimp canvas window.

3/ The texture is much larger than the image we're using. Zoom out (Ctrl + Mousewheel) then select the Scale tool.

4/ Click within the outline of the texture, then use the handles on the edges to resize it. Click Scale when you're done.

5/ Gimp should now look something like this.

6/ Right click on the layer with no black and select Alpha to Selection.

7/ Hide the no black layer and make the texture layer the active layer. Hit Delete on the keyboard.

8/ The texture layer should now look like the above.

9/ We're now going to use the layer with red removed to create another texture layer. First however to help avoid confusion, drag the no black layer so its below the texture layer.
Again, hide all layers except the no red layer, and make the layer below it the active layer.

10/ There is a jpeg that is predominantly red. This is just the right tone for this part of the image, so drag it onto the Gimp canvas. It should be placed just below the layer with no red.

11/ rescale this texture layer in the same way as before. Right click on the no red layer and select Alpha to Selection.

12/ Hide the no red layer, and with the new texture layer the active layer, again hit Delete.

13/ This is the result. By now it should be apparent how we're building up the collage image.

14/ Drag the no red layer below the texture layers so its out of the way. Now hide all layers except for the layer with green removed. Make the layer below it the active layer.
As before, drag in a jpeg that will make a good fit tonally. Resize it and use the Alpha to Selection step again then hit Delete. The result should look something like the above.

15/ For the last texture layer, drag it onto the Gimp canvas, resize it and place it behind all the other texture layers.
Finishing Touches

1/ There are just a few finishing touches to add to our collage image to make it look a little more authentic.
First right click on the top layer and select New from Visible. This will create a new layer from all the visible layers. Its a non-destructive alternative to merging all layers.

2/ Drag the image named Texturelabs_Glass_135XL image into Gimp, so its layer is directly above the new layer we just created. This image will give the impression of the collage being sealed under a layer of glue. Scale in the same way as with the other texture layers.

3/ From the Mode drop down menu (highlighted in red, above), select a blend mode.

4/ Overlay or Soft light work well with this texture.

5/ Finally drag the image named Texturelabs_Paper_185XL into Gimp. This texture will give the impression of folded paper. Scale the layer, then add a blend mode again of either Overlay or Soft light, (or whatever you prefer). The collage is now complete.
Although the process of creating this collage effect with Gimp is not quite as streamlined as the original Photoshop tutorial, this is still quite a good workaround. Possibly the most tedious part is creating the gradient, but its something that only has to be done once, and it can be used on all future collage effect projects.


