How To Create A Seamless Tiled Texture Or Pattern In Inkscape
By
00:29:00

In this tutorial we'll show how to create a tiled texture or pattern in Inkscape, using a fleur de lis design surrounded by an ornate border. Since creating the fleur de lis is really a subject in its own right, and would needlessly increase the length of this tutorial, we won't go into how to do that here.
Instead, you can of course use your own design or download the fleur de lis SVG used here. The download includes a png of the fleur de lis, as well as a png of the finished tile created here along with its SVG file.
Instead, you can of course use your own design or download the fleur de lis SVG used here. The download includes a png of the fleur de lis, as well as a png of the finished tile created here along with its SVG file.
This tutorial focuses on how to create the ornate border and ensure it is perfectly symmetrical, how to add the fleur de lis, and then how to turn what we've created into a tile that can be repeated seamlesly.
All the images here can be clicked to view full size.
There is also a video version of this tutorial on our YouTube channel.
All the images here can be clicked to view full size.
There is also a video version of this tutorial on our YouTube channel.
How To Create A Tiled Texture Or Pattern In Inkscape

1/ With Inkscape open drag a guide from the top ruler, then one from the side ruler to the left.


2/ Select the elipse tool, and holding down Shift > Ctrl drag the cursor to create a circle. The circle here has an outer stroke of 4px and no fill.

3/ With the circle selected hit Ctrl > D to duplicate it. Now drag the duplicate to the right so both circles connect as in the image above. Hold down Ctrl whilst dragging the duplicate so it moves in a straight line.

4/ Select one of the circles, hold down Shift and select the other circle. Both should now be selected. press Ctrl > G to group the circles. Now drag the circles so the centre aligns with the vertical guide, as above.

5/ With the circle selected hit Ctrl > D again to duplicate them. Hit the Rotate Selection 90° button, highlighted in red, above.

6/ There should now be four circles placed as above.

7/ Drag the cursor over the circles so they're all selected, then whilst holding down Ctrl drag them so they're aligned at the cross point of the guides, as above.

8/ Select the two vertically positioned circles (the ones that form an upright figure of 8), and hit Ctrl> Shift > G to ungroup them.
Select the top circle and hit Ctrl > D to duplicate it. Hold down Ctrl and drag the duplicate to position it so it touches the two horizontal circles. The thickness of the circle's outline should overlap.

9/ Repeat step 8 with the lower circle so you get a formation of circles as above.
A lot of the circles we're adding here are used to measure spacing and to add proportion to the finished design. They will eventually be deleted.

10/ With the rectangle tool drag out a rectangle shape and align its edges as above. The thickness of its outline should overlap the thickness of the circles, rather than butt up against them.

11/ Select the central horizontal circles and duplicate them. Hold down Ctrl and place them towards the top, as above. Again, the circles' outline should overlap that of the circle it touches.
Repeat this step and place the duplicated circles towards the bottom. You should have an arrangement of circles as in the above image.

1/ First remove the circles we don't need. Select a circle and hit Delete on the keyboard to remove it. If you delete a circle by mistake hit Ctrl > Z to undo. You should end up with an arrangement of shapes as above.

2/ Select a pair of circles and hit Ctrl > Shift G to ungroup them. Do this for each of the three pairs of circles.
Now select the top two circles and hit Path > Union so they form one shape. Do the same with the lower two circles, but leave the central two circles as they are.

3/ Select one of the central circles, hold Shift and select the rectangle. Select Path > Union to form one shape. Repeat this with the other central circle, so you get a shape as above.

4/ Select the upper two circles, hold Shift and select the rectangle. Now hit Path > Difference.

5/ You should now have a shape as above.

6/ Repeat step 4 to create the shape above.
We now have the border to place around the fleur de lis design.

1/ First add a few more guides that align precisely as in the image above.

2/ Use the rectangle tool to draw a box that covers one quarter of the design. The box should consist of a fill with no stroke. Here the box has been given a colour so the edges can be seen clearly. Each edge should join to the guides, as you can see in the above image.

3/ Select both the rectangle and the border design.

4/ Now select Path > Intersection.

5/ We now have just one quarter of the original border design.

6/ Duplicate this shape, then hit the Flip Selected Objects Horizontally icon, highlighted above in red.

7/ This is the result with the duplicate flipped.

8/ hold down Ctrl and drag the duplicate as above. the two shapes should snap together if snapping is enabled. (You can see what snapping options are enabled here to the right of the image in step 6, which shows the full UI of Inkscape).

9/ Select both objects then hit Path > Union, and they will form one shape.

10/ Duplicate this shape and flip it vertically.

11/ Hold Ctrl and drag the duplicate up so the two objects align as above.

12/ Hit Path > Union and you'll have the perfectly symmetrical shape you see above.

1/ Now we have our symmetrical border design its time to add the fleur de lis and create a seamless tile. Firstly we'll hide the guides as we don't need them right now. Select View > Guides to hide them.

2/ To add the fleur de lis SVG, navigate to where its stored on your PC, then drag it into Inkscape. To resize it, hold down Ctrl > Shift and drag a corner arrow until you get the size you want. Now place it in the centre of the border.

3/ To make sure the fleur de lis is centred within the border object, hit Shift > Ctrl > A to open the Align and Distribute panel. Select both the fleur de lis and border and hit the two options highlighted in red and green above.

4/ Both objects are now aligned just as we want them. Select both objects again and group them (Ctrl > G). Now hit Ctrl > D to make a duplicate.

5/ Drag the duplicate and place it as above. The edges of both objects should snap together.

6/ Make another duplicate and place it as above.

7/ Select the two upper objects and duplicate them. Hold Ctrl and drag them into position as in in the image above.

8/ Drag the central object to the side and ungroup it (Shift > Ctrl > G). Select the four other objects and group them.

9/ Place the fleur de lis from the ungrouped object back into the centre of the four objects. Use the Align and Distribute panel again to centre it, then group it to the four other grouped objects.
The border we removed from the centre can be deleted.

10/ Turn on the visibilty of the guides again (View > Guides), then add a few more so they look like the above. The central guides seen here aren't important, its the outer guides we'll be using.

11/ With the Rectangle tool, draw a rectangle. All of the rectangle's corners should be at the centres of the four outer motifs, as can be seen above. The guides we're using cross at these points.

12/ Select the rectangle and the grouped object. Now select Edit > Clip > Set.

13/ The object has now been clipped, and we have a tile that when repeated will form a seamless pattern.

1/ The tile can now be exported out of Inkscape and used elsewhere, but we can see how it looks before we do that. The basic way of trying out the tile is to duplicate it, drag it next to the original, and just keep duplicating and dragging.

2/ Another option is to select the tile then hit Edit > Clone > Create Tiled Clones.

3/ This panel will open to the right of Inkscape. Add the number of rows and columns you want in the area highlighted in red, then hit the Create button.

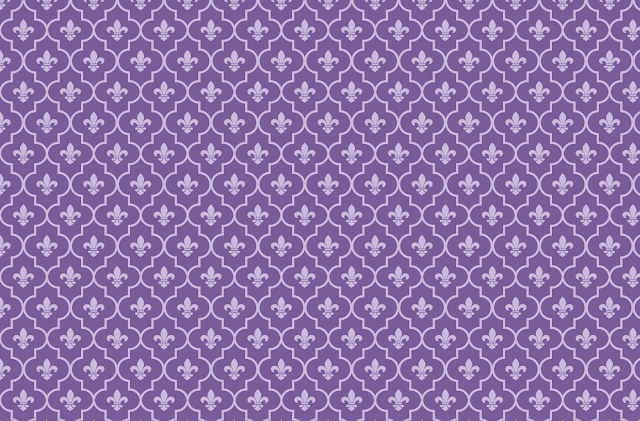
4/ Inkscape may take a second or two, but it will produce a tiling pattern made up of the number of rows and columns selected.
Thats all there is to creating a seamless tiled texture or pattern in Inkscape. I hope you found this useful, and we'll be back with more tutorials very soon.

3/ With the circle selected hit Ctrl > D to duplicate it. Now drag the duplicate to the right so both circles connect as in the image above. Hold down Ctrl whilst dragging the duplicate so it moves in a straight line.

4/ Select one of the circles, hold down Shift and select the other circle. Both should now be selected. press Ctrl > G to group the circles. Now drag the circles so the centre aligns with the vertical guide, as above.

5/ With the circle selected hit Ctrl > D again to duplicate them. Hit the Rotate Selection 90° button, highlighted in red, above.

6/ There should now be four circles placed as above.

7/ Drag the cursor over the circles so they're all selected, then whilst holding down Ctrl drag them so they're aligned at the cross point of the guides, as above.

8/ Select the two vertically positioned circles (the ones that form an upright figure of 8), and hit Ctrl> Shift > G to ungroup them.
Select the top circle and hit Ctrl > D to duplicate it. Hold down Ctrl and drag the duplicate to position it so it touches the two horizontal circles. The thickness of the circle's outline should overlap.

9/ Repeat step 8 with the lower circle so you get a formation of circles as above.
A lot of the circles we're adding here are used to measure spacing and to add proportion to the finished design. They will eventually be deleted.

10/ With the rectangle tool drag out a rectangle shape and align its edges as above. The thickness of its outline should overlap the thickness of the circles, rather than butt up against them.

11/ Select the central horizontal circles and duplicate them. Hold down Ctrl and place them towards the top, as above. Again, the circles' outline should overlap that of the circle it touches.
Repeat this step and place the duplicated circles towards the bottom. You should have an arrangement of circles as in the above image.
Forming The Ornate Border
We now have all we need to create the border.

2/ Select a pair of circles and hit Ctrl > Shift G to ungroup them. Do this for each of the three pairs of circles.
Now select the top two circles and hit Path > Union so they form one shape. Do the same with the lower two circles, but leave the central two circles as they are.

3/ Select one of the central circles, hold Shift and select the rectangle. Select Path > Union to form one shape. Repeat this with the other central circle, so you get a shape as above.

4/ Select the upper two circles, hold Shift and select the rectangle. Now hit Path > Difference.

5/ You should now have a shape as above.

6/ Repeat step 4 to create the shape above.
We now have the border to place around the fleur de lis design.
Ensuring The Shape Is Symmetrical
Following the steps below to make sure our border shape is symmetrical is not strictly necessary, but it may save us having to work out what went wrong if the pattern doesn't repeat perfectly.
1/ First add a few more guides that align precisely as in the image above.

2/ Use the rectangle tool to draw a box that covers one quarter of the design. The box should consist of a fill with no stroke. Here the box has been given a colour so the edges can be seen clearly. Each edge should join to the guides, as you can see in the above image.

3/ Select both the rectangle and the border design.

4/ Now select Path > Intersection.

5/ We now have just one quarter of the original border design.

6/ Duplicate this shape, then hit the Flip Selected Objects Horizontally icon, highlighted above in red.

7/ This is the result with the duplicate flipped.

8/ hold down Ctrl and drag the duplicate as above. the two shapes should snap together if snapping is enabled. (You can see what snapping options are enabled here to the right of the image in step 6, which shows the full UI of Inkscape).

9/ Select both objects then hit Path > Union, and they will form one shape.

10/ Duplicate this shape and flip it vertically.

11/ Hold Ctrl and drag the duplicate up so the two objects align as above.

12/ Hit Path > Union and you'll have the perfectly symmetrical shape you see above.
Creating The Seamless Tile

1/ Now we have our symmetrical border design its time to add the fleur de lis and create a seamless tile. Firstly we'll hide the guides as we don't need them right now. Select View > Guides to hide them.

2/ To add the fleur de lis SVG, navigate to where its stored on your PC, then drag it into Inkscape. To resize it, hold down Ctrl > Shift and drag a corner arrow until you get the size you want. Now place it in the centre of the border.
3/ To make sure the fleur de lis is centred within the border object, hit Shift > Ctrl > A to open the Align and Distribute panel. Select both the fleur de lis and border and hit the two options highlighted in red and green above.

4/ Both objects are now aligned just as we want them. Select both objects again and group them (Ctrl > G). Now hit Ctrl > D to make a duplicate.

5/ Drag the duplicate and place it as above. The edges of both objects should snap together.

6/ Make another duplicate and place it as above.

7/ Select the two upper objects and duplicate them. Hold Ctrl and drag them into position as in in the image above.

8/ Drag the central object to the side and ungroup it (Shift > Ctrl > G). Select the four other objects and group them.

9/ Place the fleur de lis from the ungrouped object back into the centre of the four objects. Use the Align and Distribute panel again to centre it, then group it to the four other grouped objects.
The border we removed from the centre can be deleted.

10/ Turn on the visibilty of the guides again (View > Guides), then add a few more so they look like the above. The central guides seen here aren't important, its the outer guides we'll be using.

11/ With the Rectangle tool, draw a rectangle. All of the rectangle's corners should be at the centres of the four outer motifs, as can be seen above. The guides we're using cross at these points.

12/ Select the rectangle and the grouped object. Now select Edit > Clip > Set.

13/ The object has now been clipped, and we have a tile that when repeated will form a seamless pattern.
Trying Out the Seamless Tile in Inkscape

1/ The tile can now be exported out of Inkscape and used elsewhere, but we can see how it looks before we do that. The basic way of trying out the tile is to duplicate it, drag it next to the original, and just keep duplicating and dragging.

2/ Another option is to select the tile then hit Edit > Clone > Create Tiled Clones.
3/ This panel will open to the right of Inkscape. Add the number of rows and columns you want in the area highlighted in red, then hit the Create button.

4/ Inkscape may take a second or two, but it will produce a tiling pattern made up of the number of rows and columns selected.
Thats all there is to creating a seamless tiled texture or pattern in Inkscape. I hope you found this useful, and we'll be back with more tutorials very soon.


