Using colour palettes to generate harmonious colour schemes is a time saving process when creating digital imagery and graphics, and is especially useful when the same set of colours need to be used on a number of projects.
A basic example of this could be graphics used to brand a club or store. Once the colour scheme has been established, a palette makes it easy to add the same colours to new logos, posters and whatever else comes to mind.
To help get a perspective on generating colour palettes, the subject is going to be covered in three tutorials:
In this first tutorial we'll look at three well known and easy to use online platforms, and cover the essentials of using them to start creating palettes.
Palettable
Palettable is a very straightforward website that allows visitors to generate palettes of five colours. This may not seem much, but Palettable is quite a stripped down palette generator for anyone who doesn't need bells and whistles.
1/ When the Palettable page is first opened it will display a random colour with its hex value.
2/ To edit the starting colour click on the icon below the hex value and drag the cursor within the rectangle. The cursor in the colour slider can also be dragged to change the initial colour.
3/ When you find a colour you want to keep, hit the Like button. Hitting the Dislike button will start the process from scratch with another random colour.
4/ A second colour will now be displayed. Clicking the Dislike button will remove this colour and another will be suggested.
5/ As with the starting colour, the second one can be edited by clicking the icon under the hex value.
6/ Once you've finished editing the second colour, click the Like or Dislike button again, then repeat the above steps until there are five colours. To save the palette hit the Export button.
7/ The palette can now be exported as a link or a PNG image. Although it may not be clear how the PNG file can be of any use, in the final tutorial in this series we'll be showing how the image can be used to create a Gimp palette.
Assuming the PNG button has been selected, now navigate to where you want the image to be saved on the PC, name it and click OK.
You've now created your first colour scheme in Palettable.
Colormind
Colormind is another simple colour palette generator, although it does have a few more features than Palettable. One thing it lacks however, is the option to export palettes. This is not much of a problem though, because by using software such as Greenshot to grab and save a defined area of the screen, this can easily be bypassed. Once a PNG of the palette has been saved, as with Palettable it can be used to create a Gimp palette.
As with Palettable, Colormind palettes are also limited to five colours.
1/ When Colormind is first opened a random palette will be generated at the top of the page, with the hex of each colour clearly shown. If this palette doesn't appeal, hit the Generate button for a new one.
2/ If you like just one or two colours generated in the palette, hit the padlock icon beneath the ones you want to keep before hitting the Generate button again.
3/ Each colour can be edited by clicking the icon highlighted in red above, then dragging the cursor to find a more suitable hue. The marker in the colour band can also be dragged to search for a new colour.
4/ The order of the palette can be changed by clicking the arrow icons under each colour, highlighted in red.
These are essentially the main tools within Colormind that can be used to create palettes, although there is one more that allows users to generate limited palettes from images..
Generating Colour Palettes from Images With Colormind
Using images to generate colour palettes be a useful tool, and its one that Colormind can handle. The one drawback however is that again, it will only generate a palette of five colours.
1/ To the top right of Colormind is an Image Upload link button.
2/ This page will open. Hit the Image Upload button to the left.
3/ The image will load under the palette.
4/ Five colours from the image will be displayed in the palette.
5/ There aren't any options to edit the palette, but if the Generate button is clicked another selection of colours from the image will make up a new palette.
Coolors
Of the three online colour palette generaters discussed here, Coolors has the most comprehensive features, and whilst the other two are good for creating limited palettes quickly, this option far out strips them. In fact the only real downside to Coolors is the small screens that appear the first time its opened. After that, apart from a few small advert windows that can also be closed, they won't appear again, (Coolors is free to use, so I don't blame the owner for trying to make a little ad revenue from it).
1/ To start creating a colour palette, hit the Start the generator button, show above.
2/ When the generator is opened a random pallette is displayed, along with its hex and colour name.
3/ Hover the cursor over a colour and a column of icons appear:
- The padlock locks a colour, so the generator can find other matching colours.
- The double squares icon copies the hex value.
- The double headed arrow enables a colour to be dragged to a different position in the palette.
- The star saves the colour to favourites
- The grid icon displays a range of shades of the colour within the column. Clicking one of the shades will replace the original colour.
- The X removes the colour from the palette.
4/ If you know the hex of a colour that you'd like to form a palette from, click the hex shown in any column in the palette. In the window that opens, add the new hex.
5/ Click the padlock icon in the same column to lock the colour. Now hit the spacebar on the keyboard to generate a palette.
6/ A new palette will be displayed, including the locked colour originally added from the hex.
7/ When a new palette is generated, each colour you want to keep can be locked. Hit the spacebar again, then lock each colour you want in the palette. If more colours are needed, hover the cursor over the border of two colours and a plus sign will appear. Click it and another column will be added to the palette. Altogether, there can be ten colours in the palette. Repeat these steps until you have all the colours you want.
8/ Towards the top right of the Coolors page is an Export button. Click it and the above window will open, with a lot more options than Palletable and Colormind. However, we're still going to use the export image option.
9/ This window will now open with the options to name the palette and select a color space. Here we've stuck with hex. Under Labels each colour can be named.
When you're ready, hit Export. Navigate to where you want to save the palette to on the PC, then hit OK.
Generating a Colour Palette From An Image With Coolor
This is another fully formed feature of Coolor, which allows users to generate colour palettes from images. Although the full range of image colours won't be included in the palette, up to ten can be, and all colours can be edited.
1/ Towards the top middle of the Coolors page is a camera icon. Click this to start creating a palette from an image.
2/ The above window will appear. Navigate to where the image is stored on the PC then drag it onto the window.
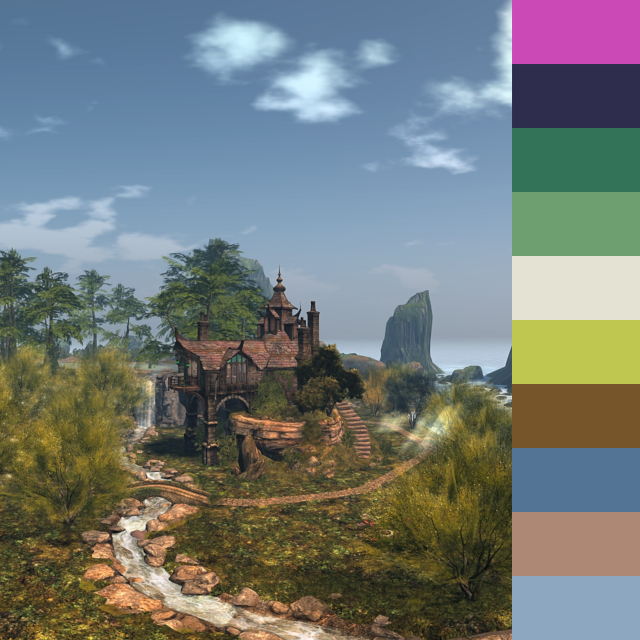
3/ The image will load into the window with a palette of five colours.
4/ Click on a colour in the palette then click on an area of the image, and the colour under the cursor will replace the original.
Dragging the slider handle, (bottom of the window), will scroll through colours of the palette generated from the image. The circle in the image will move to the position of the colour as you scroll. Whilst many colours will be displayed as you scroll, its worth remembering only ten can be exported as a palette.
Click on the + icon to add more colours to the palette, and the minus icon to remove them.
5/ When you're ready to export the palette hit Next, top right. From the drop down list hit Export Palette.
19/ The Export window will open again with the same export options as before. Just follow the same steps as above to save the palette.
Thats all there is to generating palettes online and saving them to your PC. Although all of the palettes here have been exported as images, they easily can be converted to palettes in graphics software such as Gimp, and we'll be covering this in the third and final tutorial in this series.
As a final note, palettes can also be exported from Coolors as a colour scheme alongside the image it was generated from. Instead of clicking on Export Palette from the drop down menu mentioned above, select Create Collage. Play with the options in the window that opens, and when you're ready hit Export.
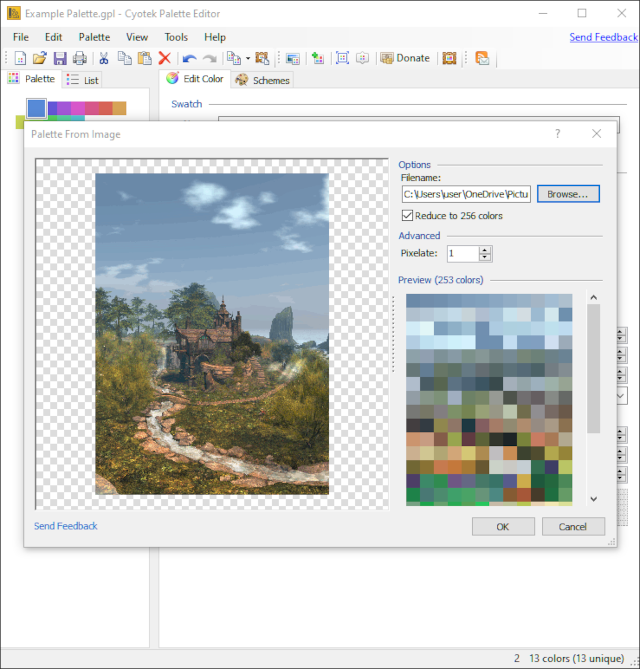
In the second in this series of colour palette tutorials we'll be looking at free palette generating software called Cyotek Palette Editor.