Lusus

Creating Textures With PatternCooler

Creating Textures With PatternCooler

The free online Patterncooler software created by Harvey Rayner is a remarkable tool for creating seamless patterns to use as backgrounds on blogs, web and graphic design projects, wallpapers, and of course textures for Second Life.

Getting Started

Because Patterncooler offers so many variations, it can be difficult to know where to get started, so after clicking the centre of the screen to open the Patterncooler interface, the best option seems to be to select a texture thumbnail at random and experiment.

Once you see how this works, you can also click on the 'Show color variations as thumbs' tab, which will allow you to edit the colours of the texture in the main window.

The Pattern Spread App

Creating Textures With PatternCooler

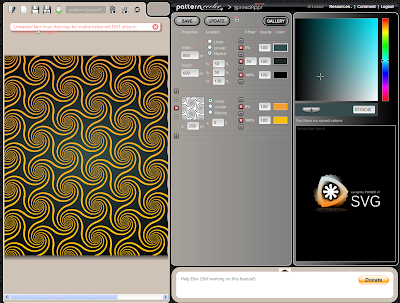
Patterncooler allows another way to work with textures other than the method above. Next to the Patterncooler logo is a white inverted arrow. Hover your cursor over this and from the drop down menu select Pattern Spread App. You will then be presented with a number of galleries of textures. Once you have selected a texture to work with, a window similar to the image above will open.

Under the Pattern Spread App, each texture is constructed of a number of layers of patterns. Each layer can be edited and new ones can be added and existing ones removed, by using the '+' or 'X' buttons next to each pattern. It is also possible to edit the size of each pattern on the texture as well as its colour values.

Registering With Patterncooler

Another option offered to users of Patterncooler is to register with the site, which will enable you to save projects and come back to them later as well as adding them to the gallery. You will also be able to view what textures you have downloaded, which all helps to make this app much more user friendly.

One of the remarkable aspects of Patterncooler is that it is free to use and that you can use the patterns you download pretty much as you like. However, depending on what the pattern will be used for, there is an option to pay for each download which allows for a better quality images. Also there is a donate button which I think is worth using considering everything Patterncooler offers its users.

This is a basic run through of what Patterncooler can do, so its worth taking a look and seeing just how useful a tool it is for creating online patterns for blogs and websites, and possibly textures to use in Second Life.

Read More
Lusus

Creating A Cubed Icon Or Logo With Gimp

Creating A Cubed Icon Or Logo With Gimp

If you have a blog, website or a business in Second Life, it is likely you have created an icon or Logo as a way of making it more distinctive. It can be useful to display that icon in a number of ways, so in this tutorial we are going to create a cubed icon or logo with Gimp.

1/ The first step is to load your icon into Gimp. Then select Filters > Map > Map Object.

Creating A Cubed Icon Or Logo With Gimp: select Filters > Map > Map object

2/ The above window will open, and in the drop down list select Box. Also select Transparent Background so we can add our own background to the finished cube. Next click on the Orientation tab.

Creating A Cubed Icon Or Logo With Gimp

3/ You will see there are sliders so you can place the cube at the angle you want. Experiment with these sliders to get the look that suits you.

You can also see from the image above there is a live update option so you can see what your cube will look like. However, with large image this can take a while to update. Using the wireframe mode is much quicker.
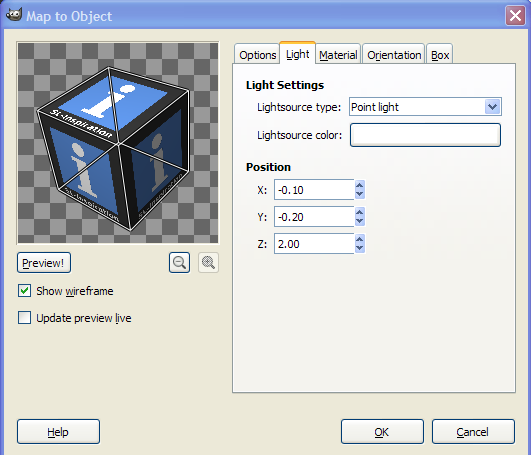
Creating A Cubed Icon Or Logo With Gimp: Using wireframe mode

4/ After adjusting the rotaion of the cube there is another tab that allows you to adjust the lighting. Again experimentation is the best way to find what you like.

Creating A Cubed Icon Or Logo With Gimp

5/ When you are ready click OK and Gimp will create your cube with your icon or logo on each face.

Your cubed icon is complete, although there are further steps you can take to improve its appearance, such as adding a shadow and a background.

Before continuing with the following steps, autocrop the cube layer and export it. Now open a new window in Gimp that is larger than the cube icon image, (you may want to scale the cube image to make it smaller if necessary).

Adding A Shadow

1/ Add the cubed icon image to the new window with File > Open as Layer. Now create a new layer that is transparent and place it below the cube layer.

Creating A Cubed Icon Or Logo With Gimp: Adding a shadow

2/ Using the Paths tool, draw an outline of the cube, clicking with your mouse at each corner to change direction. Hide the cube layer and make the transparent layer the active layer.

Creating A Cubed Icon Or Logo With Gimp

4/ When you have finished select the Edit radial button below the tools icons, and then select Selection from Path. Using the Bucket Fill tool, fill the shape you have created with black. Your finished layer should look something like the image above.

Creating A Cubed Icon Or Logo With Gimp

5/ From the Toolbox, select the Perspective tool. By placing your cursor over the corners of the grid and holding down the left mouse button you will be bale to deform the shape you created until it looks like a shadow for the cube. The shape can be repositioned by dragging the central circle on the grid.

This stage may take a little trial and error, and you can of course use the Undo option if you need to. When you are ready click Transform in the small window (pictured above).

Creating A Cubed Icon Or Logo With Gimp: Completed cube with transparent background

6/ Next go to Filters > Blur > Gaussian Blur and select a blur that suits your image. something like 25 may be a good starting point. Experiment with the Opacity slider at the top of the Layers panel until the layer looks like the kind of shadow you want.

You can of course save your cubed icon as it is, but next we are going to soften the corners on the cube here

Rounding Off the Cube's Corners And Edges

1/ First create another transparent layer and place it above the cube layer.

2/ With the Color Picker tool select the color of the lower right face of the cube (or whatever lower face that has the lightest tone).

3/ Now make sure the new layer is the active layer, and select the Brush tool. Choose a brush size that will suit your image. A little trial and error may be needed, although one with a blurred edge is most useful.

4/ Place the cursor at the bottom corner of the cube and holding down shift drage the cursor up to the top corner of this cube edge.

5/ Repeat this for the top interior edges of the cube but use the Color Picker tool to select the lighter tone of the upper surface. Right click on this layer in the Layers Panel and Merge it with the cube layer.

Creating A Cubed Icon Or Logo With Gimp: Rounding off edges
6/ To round off the exterior corners, select the Eraser tool and gently draw a curve on each corner. Zooming in on each corner makes this easier to do, as well as selecting the right sized brush for your particular image. This should also tidy up any messy bits created by smoothing the interior edges.

Creating A Cubed Icon Or Logo With Gimp: Cubed Logo
7/ When you have finished, go to Filters > Blur Gaussian Blur and choose a blur radius that will suit your image. Click OK and if necessary you can make this layer less opaque by using the slider at the top of the Layers panel.

Creating A Cubed Icon Or Logo With Gimp: Cubed logo with background

Your cube should now have rounded corners and smooth edges. All that needs to be done now is to add a background. In the example here I used the Blend tool to create a gradient of the foreground and background colours by holding and dragging the cursor from the bottom to the top of a new layer, then placing it below the other layers.

Creating a cubed icon or logo using Gimp takes just a few steps, and from there each person can decide on whether to add rounded edges and a background. This tutorial has also introduced those quite new to gimpt to a number of uses for some of the tools in Gimp.

Read More
Lusus

Builders Skybox

Builders Skybox for Second Life

Having somewhere private to build in Second Life is pretty much a necessity for many content creators, and a builders sky box is a good way of achieving that.

This Builders Skybox can be rezzed at a chosen height either temporarily on say a sandbox or permanently on your own land.

If you intend to use this skybox on a sandbox you’ll need to find one that allows scripts, and whilst many sandboxes have blocked them to cut down on griefers, there are still some out there with scripts enabled.
A few examples include Cordova and Columbia. Cordova does appear to attract a number griefers, but the skybox rezzed at height will put you out of reach of all but the most fanatical of them.

If you don't already have your Builders Skybox you can get it from the Marketplace. 

Rezzing The Builders Skybox

Positioning the sky box is quite straightforward:

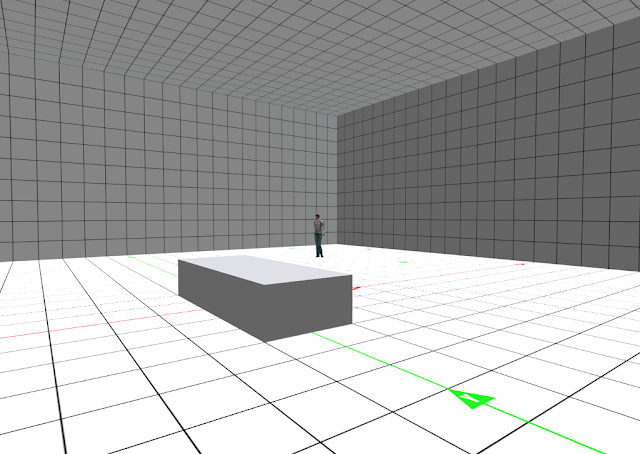
1/ First place the rezzer box on the ground in front of you. The arrow shows the direction the skybox will rez. The skybox will rez in the direction of the arrow and a few metres behind it. The rezzer will of course be inside the skybox when it is rezzed.

2/ Note: The grid guide of the sky box is aligned to the X-Y axis, so if you rotate the rezzer box this alignment will be broken.


 3/ Once the rezzer is placed on the ground, click it to sit on it. Now click it again to bring up the menu. Choose ‘SET HEIGHT.’

Builders Skybox for Second Life: Select 'height' from the menu

4/ Now choose the height from the following menu, You can also set your own height by selecting ‘OWN’ from the menu and typing your chosen height in main chat.

Builders Skybox for Second Life: The height menu

5/ You’ll now find yourself sat on the rezzer box at your chosen height (not the most dignified look, but it gets you there).

Builders Skybox for Second Life: Rezzer at selected height

6/ Click ‘REZ’ to rez the sky box and stand. If the position of the box is going to be permanent you can click  ‘DONE’ from the menu which will remove all scripts. Otherwise you can leave the rez box as it is. If the skybox's position is going to be permanent, don't forget to set a Landmark so you can teleport to it.

Builders Skybox for Second Life: Skybox interior

Removing the Builders Skybox

To remove the sky box, sit on the rezzer again and click it for the menu to appear. Now select ‘DELETE’.

To return to the ground select ‘HEIGHT’ then select your own height of around 30m. Anything less than that and the rez box may end up half buried in the ground. Once at ground level stand from the box and delete it (you’ll have a copy of it in your inventory).

 Configuring the Teleporters

If you are going to leave the Builders Skybox permanently rezzed on your land you will probably want to configure the teleporters so you can use both the inside of the box as well as the roof space. A useful hint before you start is to make sure your chosen co-ordinates aren't too close to the edge of the Builders Skybox, so you won't accidentally teleport outside of the box.

1/ Place the location finder that came with the Builders Skybox, where you want to land when you teleport to the inside of the skybox. Click the location finder and you will see in main chat the co-ordinates of the box.

Builders Skybox for Second Life: Configuring the teleporters

2/ Copy the co-ordinates by dragging your cursor over them, right clicking and then selectiing 'Copy'

3/ Use your camera to view the teleporter on the roof. Right click on it and select edit. Under the contents tab find the configuration notecard and double click it to open it.

Builders Skybox for Second Life: The teleporter notecard

 4/ Paste the co-ordinates you copied between the < > brackets (deleting the co-ordinates already there). Click 'Save'

5/ Right click on the location finder, select 'Edit' and move the box to the roof. Leave edit mode and click the location finder box. The co-ordinates for teleporting to the roof will be shown in main chat.

Builders Skybox for Second Life: setting the second teleporter

6/ Copy and paste these co-ordinates to the configuration notecard of the teleporter inside the Builders Skybox. Click 'Save'.

Your teleporters are now ready to use. If you want to, you can say '/12 LOCK' to lock the co-ordinates into the teleporters. This means they cannot be changed, (an extra pair of teleporters are provided in case you lock the scripts and later change your mind).

 Using The Advertising Boards

On the outside of the Builders Skybox are a couple of ad boards. To use them, simply drag an image texture onto the front of each one. Then replace the notecard inside of each ad board with your own notecard. Now your Skybox acts as free advertising for you. 

Whenever anyone clicks on the ad boards they will recieve your notecard. (It has to be said that if your skybox is rezzed at height not too many people will get to see the ad boards but they are there on the principal that all advertising counts.

Thats all there is to setting up your Builders Skybox. I hope you enjoy this item and find it very useful. As always, feel free to contact me if you have any further questions relating to this item.


Read More