Showing posts with label Marketplace. Show all posts
Lusus

How To Use The Free Rooms Templates

 
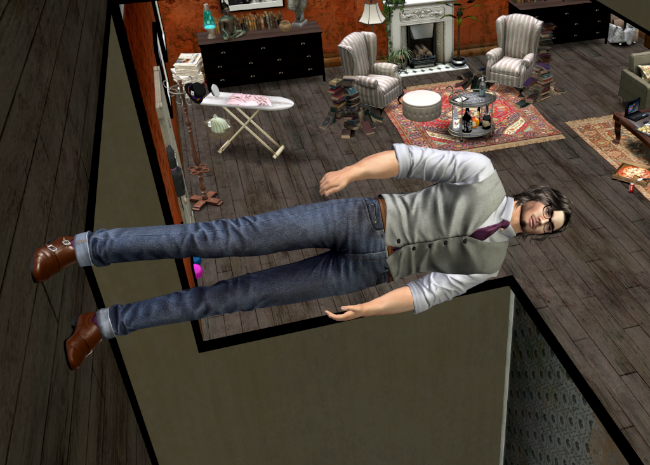
A scene in Second Life of a man in the foreground, standing on a tilted floor. Another room in the background is at a normal position.

As part of the celebrations for Second Life's 19th birthday, exhibitors were able to offer gifts to visitors, and whilst I had some windchimes to give away, I wasn't able to complete in time the gift I originally intended to offer. Not to be deterred, the gift of a copy of the build that formed my exhibit is now available.

To be clear, what is available is the build of the rooms themselves, rather than the content. I've called them templates because they are effectively blank canvases for anyone to use to create their own unique builds, as well as their own unique 360 degree imagery. 
 
Grab your Free copy of the Rooms Templates from the Marketplace here.

What Are The Rooms Templates? 

 
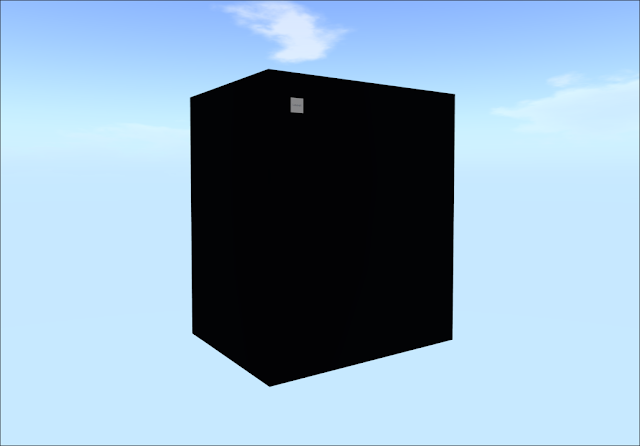
A Large black cube in the sky containing the rooms.

'Rooms' is a project I've been working on for a while, and consists of three rooms contained inside a black cube. Each room interlocks with the next with the intention of making the viewer/visitor question the space they're in, and by extention the nature of 3D virtual space. This 360 panorama is the end result.

A view of one of the rooms. At an uturned angle a figure can be seen from above in another room, some distance away.

The starting point for the project was to create something that would make 360 degree panoramas in Second Life that had an unexpected feel. The possibility that the rooms might be an interesting place to visit and interect with developed from this.

The dining room with table laid out with a meal in the foreground.

From that point it also occured to me that since everyone's imagination works in different ways then everyone would construct something different using these rooms. For instance, take a look at this 360 panorama and how it uses space in a similar way, but looks very different. The idea therefore came to be to offer the rooms as templates for people to develop in any direction their creativity took them, in the hope they would create their own amazing 360 degree panoramas, and possibly allow others to visit their builds in Second Life.

To find out more about Rooms at SL19B, take a look this blog post.

What Is Included With The Rooms Templates?


When you recieve this item from the Second Life Marketplace it will contain:
  • Land Footprint
  • Rooms Template Rezzer. This is the red box with an arrow on top. This will rez the rooms with windows and views outside of them.
  • Rooms Template Rezzer No Windows. This is the orange box with an arrow on top. This will rez a version of the rooms that has no windows.
  • Rooms Buttons a. These buttons control the views outside the middle room.
  • Rooms Buttons b. These buttons control the views outside the lower room.
  • Rooms Buttons c. These buttons control the views outside the upper room.
The idea of having two versions of the room templates is to add more options for what can be created with them.

Both versions of the rooms are big. The version with windows has a footprint of about 30m x 24m, (and a prim count of 43), whilst the other is around 24m x 23m (with a prim count of 27). Because of this large size, and to help with placement on a parcel, a footprint object has been included, as can be seen above. The purple area shows the footprint of the smaller template, whilst both the purple and green areas together show the footprint of the template with windows.

As well as being important in positioning the rooms in relation to a land parcel, the footprint object is also used to accurately rez the rooms at height, as we'll see in a moment.

Rez Boxes

 
The footprint object includes a red square with an arrow, and an orange square with an arrow.

 
Place the red rezzer box on top of the red square so both arrows are aligned. Now the rooms with windows will rez exactly where the footprint is.

 
Placing the orange rezzer box over the orange square of the footprint and making sure both arrows are aligned will ensure the rooms without windows will rez precisely over the purple area of the footprint.

Using The Rezz Boxes


Although the rooms can be rezzed on the ground, they are intended as skyboxes. To rez one of the rooms templates, follow these simple steps.

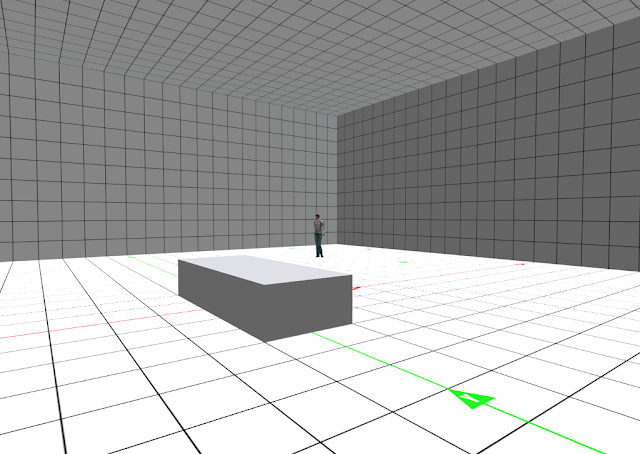
1/ Rez the footprint object on the ground and place it where you want the rooms to be placed. Get close to the grey box and sit on it.


2/ Right click on the footprint object  and from the menu click Edit, so the Edit Window opens. Make the Object tab the active tab.

The area highlighted in red in the Edit Window is what we're interested in. We'll use it to edit the Z position of the footprint object. (For those that may not know Z is the up/down co-ordinate in virtual space, so we're about to change the height of the footprint object).


3/ Enter how high you want the rooms template to be from the ground. Here 1000 was added. When you're ready hit Enter on the keyboard, and the footprint object will be repositioned 1000m in the sky.
 
Because you sat on part of the footprint object you'll also be transported to 1000m in the sky.

Once the footprint object is in the sky you can stand up.


4/ Position one of the rez boxes over the corresponding coloured square on the footprint. Then left click on the rez box.


5/ This window will appear. To rez the rooms hit the Rezz button.


6/ The rooms are now rezzed. As you can see there aren't any textures on the walls or ceilings of the rooms (although there are floor textures). This is so you can start with the blank canvas that was mentioned earlier.
 
Its also important to note that you'll be standing in one of the rooms after they have rezzed. This is because there is no way in or out of the build, so being inside after rezzing means you can set a landmark and easily access the rooms.


7/ Left click the rez box again and this menu will appear. if you're happy with the position of the rooms, hit the Freeze button to remove the rez script from the rooms. 

If you want to remove the rooms, hit the Remove button.


8/ The rooms template is now rezzed, so you can delete the rez box as well as the footprint object. Remember to landmark a position within the rooms template so you can access it again.

Using the Window Buttons

 
The final items included with the room templates are the window buttons. There is a set for each room. The red button allows you to select the scene, and the blue button enables it to scroll.

Each set of buttons has a slightly different name. 'Rooms Buttons a' should be rezzed in the room you'll be standing in after removing the footprint and rez box. 'Rooms Buttons b' belongs in the lower room, and 'Rooms Buttons c' belongs in the upper room.

Unfortunately I could not include the scripts for the buttons and scenes with mod permissions because they're commerical scripts that I didn't create. If you'd like to use your own scenes, simply delete the scripts in the buttons and the scene viewer and add your own. I'll try to find a better option asap.

You're now ready to start using these rooms templates for your own creations. If you'd also like to use them to create 360 degree images, then these tutorials will be very useful. I should add that stitching images of the rooms into 360 panoramas can be tricky. Sometimes it works first time, other times there can be a lot of trial and error to get it right. The tutorials mentioned above suggest using a setting of between 60 - 90 for the HFOV in Hugin. In the case of the 360 panorama created from these rooms, 85 was used. In other panoramas, 100 was a good setting.

Wall Walker 

 
Once you've created your build using these templates, try exploring it with a wall walker. The above video is a little rough around the edges, but gives an idea of how the wall walker works.
 
There are a number of versions of wall walkers on the Marketplace, but they're all based on the original, which is open source. Therefore decide for yourself whether you want to pay for one or grab the freebie. 
 
The original wall walker comes with some unappealling walk, stand and run animations, but its easy to replace them with your own.
 
If you haven't seen a 360 degree panorama created using these rooms, take a look here, and then see what you can do with your new templates.
Read More
Lusus

Builders Skybox

Builders Skybox for Second Life

Having somewhere private to build in Second Life is pretty much a necessity for many content creators, and a builders sky box is a good way of achieving that.

This Builders Skybox can be rezzed at a chosen height either temporarily on say a sandbox or permanently on your own land.

If you intend to use this skybox on a sandbox you’ll need to find one that allows scripts, and whilst many sandboxes have blocked them to cut down on griefers, there are still some out there with scripts enabled.
A few examples include Cordova and Columbia. Cordova does appear to attract a number griefers, but the skybox rezzed at height will put you out of reach of all but the most fanatical of them.

If you don't already have your Builders Skybox you can get it from the Marketplace. 

Rezzing The Builders Skybox

Positioning the sky box is quite straightforward:

1/ First place the rezzer box on the ground in front of you. The arrow shows the direction the skybox will rez. The skybox will rez in the direction of the arrow and a few metres behind it. The rezzer will of course be inside the skybox when it is rezzed.

2/ Note: The grid guide of the sky box is aligned to the X-Y axis, so if you rotate the rezzer box this alignment will be broken.


 3/ Once the rezzer is placed on the ground, click it to sit on it. Now click it again to bring up the menu. Choose ‘SET HEIGHT.’

Builders Skybox for Second Life: Select 'height' from the menu

4/ Now choose the height from the following menu, You can also set your own height by selecting ‘OWN’ from the menu and typing your chosen height in main chat.

Builders Skybox for Second Life: The height menu

5/ You’ll now find yourself sat on the rezzer box at your chosen height (not the most dignified look, but it gets you there).

Builders Skybox for Second Life: Rezzer at selected height

6/ Click ‘REZ’ to rez the sky box and stand. If the position of the box is going to be permanent you can click  ‘DONE’ from the menu which will remove all scripts. Otherwise you can leave the rez box as it is. If the skybox's position is going to be permanent, don't forget to set a Landmark so you can teleport to it.

Builders Skybox for Second Life: Skybox interior

Removing the Builders Skybox

To remove the sky box, sit on the rezzer again and click it for the menu to appear. Now select ‘DELETE’.

To return to the ground select ‘HEIGHT’ then select your own height of around 30m. Anything less than that and the rez box may end up half buried in the ground. Once at ground level stand from the box and delete it (you’ll have a copy of it in your inventory).

 Configuring the Teleporters

If you are going to leave the Builders Skybox permanently rezzed on your land you will probably want to configure the teleporters so you can use both the inside of the box as well as the roof space. A useful hint before you start is to make sure your chosen co-ordinates aren't too close to the edge of the Builders Skybox, so you won't accidentally teleport outside of the box.

1/ Place the location finder that came with the Builders Skybox, where you want to land when you teleport to the inside of the skybox. Click the location finder and you will see in main chat the co-ordinates of the box.

Builders Skybox for Second Life: Configuring the teleporters

2/ Copy the co-ordinates by dragging your cursor over them, right clicking and then selectiing 'Copy'

3/ Use your camera to view the teleporter on the roof. Right click on it and select edit. Under the contents tab find the configuration notecard and double click it to open it.

Builders Skybox for Second Life: The teleporter notecard

 4/ Paste the co-ordinates you copied between the < > brackets (deleting the co-ordinates already there). Click 'Save'

5/ Right click on the location finder, select 'Edit' and move the box to the roof. Leave edit mode and click the location finder box. The co-ordinates for teleporting to the roof will be shown in main chat.

Builders Skybox for Second Life: setting the second teleporter

6/ Copy and paste these co-ordinates to the configuration notecard of the teleporter inside the Builders Skybox. Click 'Save'.

Your teleporters are now ready to use. If you want to, you can say '/12 LOCK' to lock the co-ordinates into the teleporters. This means they cannot be changed, (an extra pair of teleporters are provided in case you lock the scripts and later change your mind).

 Using The Advertising Boards

On the outside of the Builders Skybox are a couple of ad boards. To use them, simply drag an image texture onto the front of each one. Then replace the notecard inside of each ad board with your own notecard. Now your Skybox acts as free advertising for you. 

Whenever anyone clicks on the ad boards they will recieve your notecard. (It has to be said that if your skybox is rezzed at height not too many people will get to see the ad boards but they are there on the principal that all advertising counts.

Thats all there is to setting up your Builders Skybox. I hope you enjoy this item and find it very useful. As always, feel free to contact me if you have any further questions relating to this item.


Read More
Lusus

How to Use The SL-Inspiration Advertising Blimp


When you recieve your blimp  package it will contain two advertising blimps. The first can be boarded and flown anywhere in Second Life (anywhere that won't eject you!), The second blimp is exactly the same except it has no flight script. Instead when you rez it, it will fly in a circle above your land, with the advertising banner following behind.

You can pick up your Advertising Blimp from the Marketplace.

Flying The Blimp

1/ To fly the blimp, right click on it and select 'board' from the menu.

2/ To power up the blimp, type 'start' in main chat.

3/ Use the page up and page down arrows on your keyboard to gain height or to descend.

4/ The arrow keys control the direction of flight of the blimp.

5/ When you have landed the blimp type 'stop' in main chat to power down the blimp.

Click on 'Stand' to leave the blimp. If you get a little stuck inside the blimp click board again then stand.

Flying the blimp at height

Adding Images To The Banner

The banner at the rear of the blimp can hold multiple images and will rotate each in turn, which is handy for advertising different aspects of your business or sim. To add the images:

1/ Right click the blimp and select 'Edit'
 
2/ in the edit pane select the Contents tab.

3/ Now select 'Edit Link'.

4/ Click on the banner and drag your images from your inventory into the contents of the banner.

If you prefer, you can resize the banner to fit the proportions of your images.

The Advertising Blimp circling the SL-Inspiration store

Clicking The Blimp

When your blimp is in flight, or is rezzed above your land, anyone who clicks on it will recieve a notecard. To add your own notecard:

1/ Right click on the blimp and select Edit

2/ Remove the SL-Inspiration notecard, and add your own to the contents folder.

Your blimp is now  ready to promote your business above your land or store. Its presence alone above your property will make it stand out for some distance, especially if you if you are on the mainland or connected sims.

Enjoy your item and feel free to contact me with any further questions.
Read More
Lusus

Using The SL-Inspiration Rez Box


Using the rez box that is part of your purchase from SL-Inspiration is quite intuitive, but the basic steps are demonstrated here, which may be especially useful for anyone who has not used a rez box before.

After describing how to rez your building from the rez box I also explain how to configure the elevators for those buildings that have more than one floor. It is strongly recommended that this section is read.

What's In The Box?

When you receive your building and have added the box's contents to your inventory you should have the following items:
  • The building rez box
  • a spare elevator (in case anything goes disastrously wrong with the ones included in the build)
  • a location finder
  • a base that can be used for the building
  • a webpage opener (which should take you to this page when clicked)

Using the Rez Box

The SL-Inspiration rez box
1/ First find the rez box in your inventory and place it on the ground. Raise it a metre or so from the ground to ensure all parts of the building rez correctly.

Make sure there is also enough room for the building to rez on your land, as this may also affect how the building will rez.

2/ You will see an arrow on the top of the box. This indicates the direction the building will rez. The front of the building will rez a short distance in front of this arrow.

Select 'Rezz' to rez the building
3/ Click the box to show the menu window (shown above). From the menu select Rezz and you building will unpack from the box and rez.

A building rezzed from the box
4/ To place the building in its final position right click on the rez box and select edit. Now you can move the box, and the structure will move accordingly. Move the box in small and slow increments to ensure all parts move correctly.

5/ When you are happy with the position of the structure click on the box again and select Freeze from the menu. This will fix the position of the building permanently and remove the rez scripts. The rez box can now be taken back into your inventory.

 Configuring the Elevators

The elevators for each building are already in place, and setting them up so that visitors can teleport to each floor is a matter of adding a few lines  for each floor to the Configuration notecard.

It is important to remember however that the building should be fixed in its final position and all the rez scripts removed (as explained above), before configuring the elevators. If you set up the elevators then freeze the building, you may find this has affected how the elevators work. If you have already done this, there is a spare elevator included with your purchase which can replace the already positioned elevators if necessary.

The location finder box
1/ Place the Location Finder that came with your building at the landing point for the first elevator. Click the box and a set of co-ordinates will appear in main chat (see below).

Location co-ordinates
2/ From main chat copy the contents of the brackets.

3/ Right click on the elevator and select edit. Then select the contents tab of the edit pane. Double click on the Configuration notecard to open it.

Configuration notecard for the elevators
4/ Find the line 'Place1=<0,0,0>', and replace the contents of the brackets by pasting the co-ordinates you copied from main chat, (click on the image above for a clearer view).

5/ Give this location a name such as Ground Floor by replacing 'none' in the 'Placename1' section of the notecard. Save the notecard.

6/ Right click on the location finder and select edit again. Move the box up to the next floor and to the next landing point (this will of course involve moving your camera to see what you're doing).

7/ Click the box again so that the next co-ordinates will appear in main chat. Copy them.

8/ Follow the steps for adding the co-ordinates and name to the notecard then save the changes

9/ Once you have configured the name and co-ordinates for each landing point, you can open the notecard again, then copy its contents. You can now paste the settings to the notecard of the next elevator.

10/ when you are finished you can test your elevators. Click on the elevator button and with each click a different floor is selected (you will see the name you gave each floor). When you have the floor you want, right click on the button and select 'Teleport". This will take you to the new floor.

Once you are happy with the set up of the elevators you can say '/12 LOCK' in main chat which will lock the co-ordinates you set up in the configuration notecard.

Thats all there is to rezzing your structure and configuring your elevators. Enjoy your new purchase, and feel free to contact me with any further questions.


Read More
Lusus

Balloon Makers Kit


The Balloon Makers Kit is for people in Second Life who want to quickly create and customise their own balloons with either images or text (or both). It comprises of a balloon sculpty map, as well as some example balloons and textures. This means the balloons can be used straight out of the box or can be personalised.

You can collect your free Balloon Makers Kit from the Marketplace.

Adding Your Own Text or Images

To make it easier for creators to customise their balloons  I have made available a Gimp file that includes the balloon textures and shadow maps. This means text or images and even your own textures can easily be added to the balloons.

The steps below describe how to use this file, and will provide a newcomer to Gimp with another easy to follow tutorial which covers a number of useful features that can be applied to other projects .

The first thing to do is download the Gimp Balloon Textures file. Use the free download option. Once the file is downloaded, double click on it to open it. This assumes you have Gimp installed on your PC.


Adding Text to a Balloon

Adding Text to a balloon has been made very easy.  In the Layer Dialogue window click on the 'Text goes here' layer, then select the text option from the Toolbox window (Text is the capital A).

Now in the image window click where you see the text, delete it by pressing backspace on your keyboard, and replace it with your own text. Go back to the Layers window and turn off the Drop Shadow layer by clicking on the eye icon.

Making sure the text layer is still the active layer, select Filters > Light and Shadow > Drop Shadow. A new Window will open where you can add a subtle shadow to the text to make it more distinct. Change the settings to match those below then click OK.


Back in the Layers window again, right click on the text later and from the drop down menu select 'Merge Down'. This will merge the text with the drop shadow layer.

In the image window, select Layer > Autocrop Layer. This will make it easier to adjust the position of the text if you need to. To do this in the Toolbox window select the move option ( a four headed arrow icon), then make sure 'Move the active layer' option is active. You can find this below the icons in the Toolbox.

With the text layer still active, in the image window hold down the right mouse button over the text and you will be able to drag it to a new position. When you are happy with its placement let go of the mouse button.

Changing the Balloon Colour

Looking at the different layers, you'll see there are a number of options for balloon colours. Simply activate or de-activate each layer by clicking on the eye icons to change the background colour.

You can also add your own colours. Make the yellow layer active by clicking on it. Create a new layer by clicking on the icon to the far left below the layers window,(the icon looks like a piece of paper with a folded top right corner).

With the new layer the active layer, go to the Toolbox panel and click on the black square below the tool icons. This will bring up a colour selector window, (see below).


Simply play with this window until you get a colour you like. Once you've finished, at the top of the layers window activate the 'Balloon Shading' layer to add highlights and shading to the colour.

Saving Your Balloon Texture

To save your balloon texture go to the Layers panel, right click on the top most layer and select 'Flatten' from the drop down menu.

In the image window select File > Export. In the window that opens, give your texture a name and file extention. PNG is probably the best to use for Second Life Textures:
Texture-name.png
 Now your balloon texture is ready to be uploaded and added to your balloon in Second Life.

Adding Images or Your Own Texture to a Balloon

If you want to give the entire balloon a new texture, make sure the image is 1024 X 1024. Add the image by selecting File > Open as Layers. The texture will now be above all the other textures, so move it below the shading layer by clicking on the green down arrow thats below the layers window. Activate the shading layer to add highlights to your texture, then follow the steps above to export the texture.

You can also add an image and use a colour layer as background. Import the image as above. The layer can be resized by selecting Layer > Scale layer which will open a new window. Choose a size that suits the balloon. Click the Scale button to resize the image layer and to close the scale window.

If the image is small you may want it to appear twice, on opposite parts of the balloon. To do this, select Layer> Autocrop Layer. This will make the image layer easier to position. Below the Layers window click on the icon third from the right. This will create a copy of the image layer.

To make sure the images are aligned on the balloon accurately a guide line can be used. Click on the Move icon in the Toolbox window and make sure 'Pick a layer or guide' is selected. From the bottom (or top) edge of the image window drag your cursor to create a guide line. position it on the bottom edge of the image. Now when you move the image copy it will snap to the guideline.


In the Layers window, click on the layer that is the copied image and move it into position. You may need to adjust the position of both images so they are spaced correctly.

When you are happy with the placement of both images the texture is ready to be exported then uploaded into Second Life.


As you can see, using the Balloon Makers Kit is quite quick and easy, and although this tutorial may seem involved, a lot of the information is aimed at those unfamiliar with Gimp. Each step taken by itself is hopefully easy to follow.

Read More
Lusus

Camera Control Hud for 3D Images


This is a simple camera control hud based on Azurei Ash’s camera script. The purpose of the hud is to help users create stereo images that can be turned into anaglyph 3D images. I have created a tutorial  naturally called How to Create 3D Images for Second Life describing how to do this. You can pick up a free copy of the 3D Camera Hud from the Marketplace.

 Using the Camera Hud 

Unpack the camera to your inventory and wear it. You should then see a hollow blue square to the centre of your screen. This can be used to help position the camera and frame the subject of your snapshot.


 Click the square and it should turn red and move to the default camera position.


To move the camera to the position you want use these keyboard controls:

Left Arrow……….Rotates the camera to the left
Right Arrow………Rotates the camera to the right
Up Arrow…………Zooms the camera
Down Arrow………Zooms the camera out
Pageup……………Moves the camera upwards
Pagedown………..Moves the camera downwards

To pan the camera hold down shift and either the right or left arrow key Because the hud is configured to move the camera in small precise increments to create stereo images, it can take a while to move it into the initial position to frame the first snapshot. To make the camera move faster, hold down the left mouse button.

Taking stereo images 

Taking stereo images is simple. Position the camera for the first snapshot and save it to your hard drive. Pan the camera by holding down Shift then tapping either the right or left arrow key. Now save the second snapshot.

If you are using the hud to create anaglyph 3D images, then it is a good idea to take a series of snapshots. Take one, then pan the camera slightly then take another and so on. This way you will have a number of images to experiment with to get the best 3D image of your subject
Read More